Entertaining this summer? Make some crowd-pleasing dips. They are a convenient and delicious way to consume a wide variety of anti-inflammatory vegetables, spices, and healthy fats. While we love the convenience of purchased dips like packaged hummus, some brands may contain unnecessary levels of fat, sugar, salt, preservatives, and hard-to-pronounce ingredients. Making dips yourself allows you to control the flavor and quality – and it’s easy!
The best dips begin with a creamy base made from foods such as beans, lentils, avocados, edamame, and roasted vegetables [eggplant, carrots, squash, zucchini, peppers, cauliflower] that are blended with oil or another liquid. Add flavor boosters such as tahini, garlic, hot sauce, nut butters, nuts and seeds, lemon or lime juice, and zest to add dimension. Finish by seasoning with fresh and dried herbs, spices, salt, and pepper, and your dip is complete. Here are some of our favorite combinations with healthy vehicles ideas:
Ingredient and flavor combinations
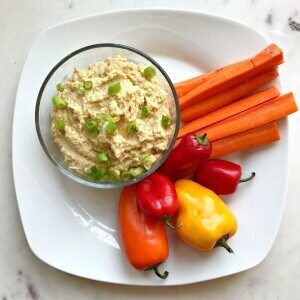
Chickpea hummus [and other beans] – The classic chickpea base is very versatile and can be made with any bean. Add tahini, garlic, lemon, and cumin to chickpeas for a traditional version. Variations include [but are not limited to] roasted red pepper, lemon kale, Moroccan carrot, roasted zucchini, kalamata olive, spicy sriracha, and creamy pesto. Try this crowd-pleasing version for Lemon Dill Hummus.
Avocado, AKA guacamole! We love the healthy fats in avocado, but the calories can be intimidating. Cut the amount of avocado in half by adding defrosted edamame beans – you will decrease the calories and increase the protein. Win, win. Add some greens to keep your dip bright and fresh. Our Kale and Edamame Guacamole is a team favorite.
Roasted vegetables – Baba ganoush is the ultimate example here – a combination of roasted eggplant, tahini, lemon, and garlic. Other roasted vegetables that work well in dips are butternut squash, cauliflower, zucchini, carrots, and peppers. Roasting them allows you to process vegetables until creamy. Start with store-bought for this nutrient-dense and super flavorful Roasted Red Pepper Walnut Dip.
Vehicles:
Carrot chips or sticks – You can purchase prepared crinkle-cut carrot chips or slice carrots on an angle. Baby carrots work too.
Cucumber chips – Slice cucumbers on an angle to maximize surface area for scooping.
Broccoli or cauliflower – Lightly steam these vegetables to bring out their sweetness – you want them to still have the firmness necessary to dip.
Green beans – Remove stems, rinse, and dip. If you prefer, you can lightly steam these as well.
Endive – This nutrient-dense vegetable is the ultimate chip – perfect shape, size, and sturdiness.
Peppers – Red, yellow, and orange peppers provide a variety of phytonutrients and are milder than green peppers.
Celery sticks – Firm and crisp, celery is a go-to vehicle.
Snap peas – These can be consumed raw or lightly steamed.
Cherry tomatoes – We love using grape tomatoes on our crudités platters, but dipping them can be tricky. Using toothpicks can help keep your fingers free of dip.
If you are interested in more Well Balanced snack options and new recipes, join us for our monthly webinar.
In this episode of Cooking with Chef Christy we get a brief overview (#lifehack) for adding juicy flavors without the fancy #sousvide equipment. She walks us through starting with a flavorful marinade for protein of your choice (such as chicken thighs). Then you cook them briefly on the grill. Lastly, you put the meat back in the marinade and bake in the oven for a flavor packed #protein.
Doing these steps in this order means that the active cooking time is finished early. You can use this passive cooking time to finish work, go play or prepare any other foods for this meal.
For more help making delicious meals like these, contact us to talk about how you can make more Well Balanced meals at home: https://wellbalancednutrition.com/contact-us/ #cooking #wellbalanced #homemade
First Add Flavor:
A marinade is a fairly quick way to add a ton of flavor to your chicken. We have this DIY recipe for you or you can buy premade spice blends at the store.
Option 1 – Moroccan Marinade (Recipe listed at the bottom of this post.)
Option 2 – Curry Blend (Recipe listed at the bottom of this post.)
Second Sear In The Flavor:
Grill the chicken for 10 minutes to for some caramelization and a bit of char if you’re into that. This step also adds a bit of texture, which holds up even after the finishing step.
Lastly, Finish Cooking In Oven:
In this method, the marinade doesn’t just flavor the outside of the chicken. Braising (which is what’s happening in the oven) allows these flavors to better penetrate the chicken. It also puts any excess marinade to good use here, as too much moisture on the grill tends to get messy.
Moroccan Chicken
1 1/2 lb boneless skinless chicken breasts
1/4 cup olive oil
1 tsp salt
1 tsp maple syrup
3 Cloves garlic, minced
2 tsp paprika
1 tsp ground cumin
1/4 tsp ground ginger
1/4 tsp turmeric optional
1/4 tsp cinnamon
1/8 tsp cayenne pepper
Directions
Whisk together all ingredients, except chicken, together in a small bowl or measuring cup. Add chicken and let marinade while grill heats or up to 12 hours.
Preheat grill.
Place chicken breasts on grill, brushing on additional marinade over top. Grill, covered, for 5-6 minutes per side.
Place seasoned, grilled chicken thighs into an oven-safe dish, along with any leftover marinade.
Add 1-2 ounces of chicken broth. *In a pinch, just use water. You’ll have plenty of flavors already.
Cover the dish tightly with foil and place in a 350-degree oven for 60- 90 minutes. The chicken should be tender and fork-shreddable after 60 minutes but can cook longer for more tenderness.
Remove from the oven, allow to cool slightly, and gently shred the chicken with a fork before serving. You can also serve the chicken in larger pieces if desired.
SUGGESTION: Serve w/ rice, peppers, green olives, lemon. Add cilantro if you have it. You can use cauliflower rice, whole grain rice, couscous or your favorite grain.
Notes:
While many ethnic foods have a reputation for being spicy, they don’t have to be. It’s very easy to omit chiles and build up a tolerance over time if you wish.
Fresh spices make a difference. Use dried spices within 3 months of opening for the best flavor.
Curry Chicken
Ingredients
1 T ground coriander seeds
1 T ground turmeric
2 t ground fenugreek seeds
2 t ground cumin seeds
1 t ground ginger
½ t ground black pepper
¼ t ground cinnamon
¼ t ground cloves
¼ t ground cardamom
¼ t ground cayenne peppers (optional)
coconut milk or Chicken Broth*
1 lb chicken thighs
Directions
Whisk together all ingredients, except chicken, together in a small bowl or measuring cup. Add chicken and let marinade while grill heats or up to 12 hours.
Preheat grill.
Place chicken breasts on grill, brushing on additional marinade over top. Grill, covered, for 5-6 minutes per side.
Place seasoned, grilled chicken thighs into an oven-safe dish, along with any leftover marinade.
Add 1-2 ounces of chicken broth or coconut milk. *In a pinch, just use water. You’ll have plenty of flavors already.
Cover the dish tightly with foil and place in a 350-degree oven for 60- 90 minutes. The chicken should be tender and fork-shreddable after 60 minutes but can cook longer for more tenderness.
Remove from the oven, allow to cool slightly, and gently shred the chicken with a fork before serving. You can also serve the chicken in larger pieces if desired.
SUGGESTION: Serve w/ jasmine rice, shreds of zucchini, and carrots
Notes:
I (Christy) like a brighter, more floral curry powder and favor a little more turmeric and less cumin than some blends.
Fresh spices make a difference. Use dried spices within 3 months of opening for the best flavor.
Plain Greek yogurt (full fat) makes a great base for the marinade too if you have this rather than coconut milk.
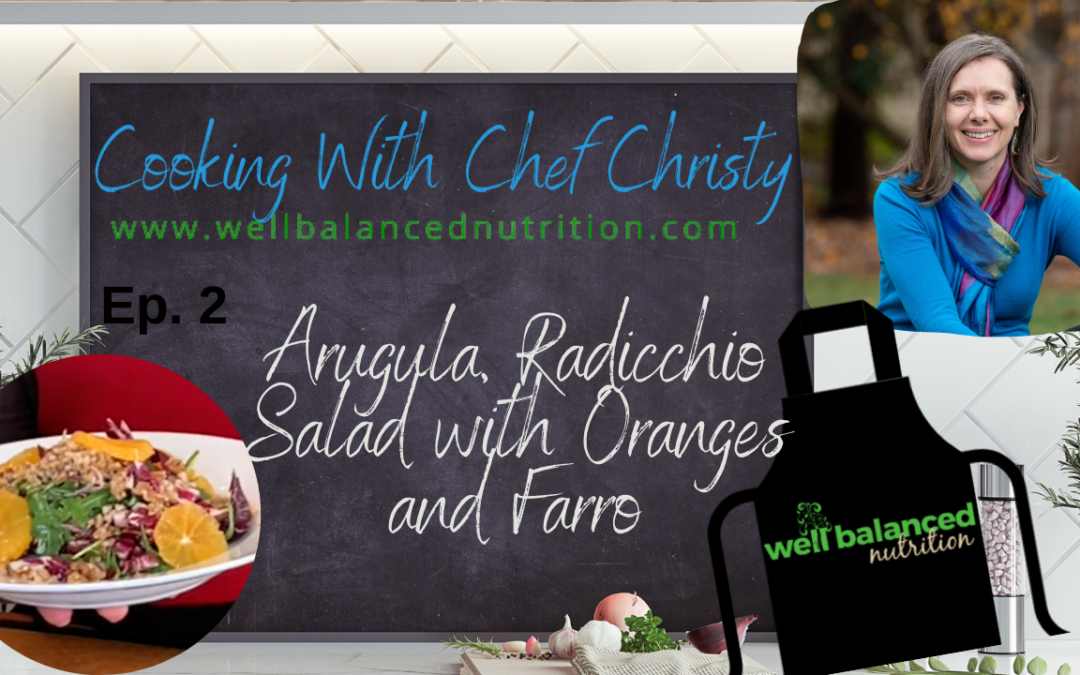
In the second episode of Cooking With Chef Christy, you’ll learn how to make a delicious and hardy salad with heart-healthy additions.
Are salads really healthy?
Salads are a great way to get in a lot of colorful plant-foods, but not every salad is a great choice. It is easy to think a salad is the healthiest option on the menu when sometimes it can be more than you need. On the flip side, a salad can lack a balance of nutrients and elements that keep you full and satisfied. Salads vary widely and the right salad for you should fit your energy needs and keep you satisfied.
How to make a salad balanced AND delicious?
Just like any meal, a salad needs a few things to be balanced AND delicious. First, include fiber, protein, and fat. Fiber can come from foods like starchy vegetables, beans, or whole grains. Protein can come from eggs, beans, nuts, seeds, meat, fish, or tofu. Fat can come from nuts, seeds, avocado, egg yolks, meat, and/or dressing. Having each of these nutrients present in your salad not only make it well balanced, but will keep you full longer.
Secondly, include an element that ramps up the satisfaction level of your meal. That might be a crunch factor, a bit of sweetness from fruit or dressing, something spicy, something creamy, or a combination. Both the nutrition and the satisfaction level of your food matter.
Be aware of how energy-dense ingredients like dressings, nuts, avocado, fried meats, cheese, dried fruit and bacon bits can add up quickly and come with more sugar, salt, fat, and calories than you may want or need in your salad.
Here’s what ingredients makes up the Arugula Radicchio salad. The only thing left to add is a piece of salmon or other great protein-rich option to round out this colorful dish.
Arugula
A cruciferous vegetable full of vitamins, minerals and antioxidants
Offers some spicy flavors to the salad.
Radicchio
A member of the chicory family
Offers a pleasantly sharp and bitter flavor.
CULINARY NOTE – The fat from the salad dressing and the acid from the citrus help curb/compliment the bitterness of this nutritous and colorful veggie.
It’s beautiful purple color is thanks to the anthocyanins present in the plant. Research shows that foods rich this chemical can have anti-inflammatory, anti-cancer, and anti-diabetic effects. It is also great for brain health and helping to prevent heart disease.
Farro
Farro is a high-fiber whole grain.
One serving of cooked farro (1/2 cup) contains about 100 calories and 1g of fat, 4g of protein, and 26g of carbohydrates.
It is an ancestor of modern wheat and contains gluten.
Commonly used in Italian cooking.
Olive Oil-Based Dressing
Olive oil is considered a healthy fat.
It’s the primary source of added fats in the Mediterranean diet.
It’s rich in heatlhy monounsaturated fat, which lowers total cholesterol and low-density lipoprotein (or “bad”) cholesterol levels.
Walnuts
Walnuts are the only tree nut that is considered anexcellent source of Omega-3s fatty acids.
A one-ounce serving of walnuts provides 2.5 grams of plant-based omega-3 fatty acid (ALA), 4g of protein and 2g of fiber
A serving of walnuts is also a good source of magnesium (45mg)
Seasonal Fruit
Fruit is a great way to add some extra fun, flavor and nutrition to your salads. In the winter, citrus fruit is perfect. In the summer, you have a variety of berries and tropical fruits to choose from.
How to make your own salad dressing
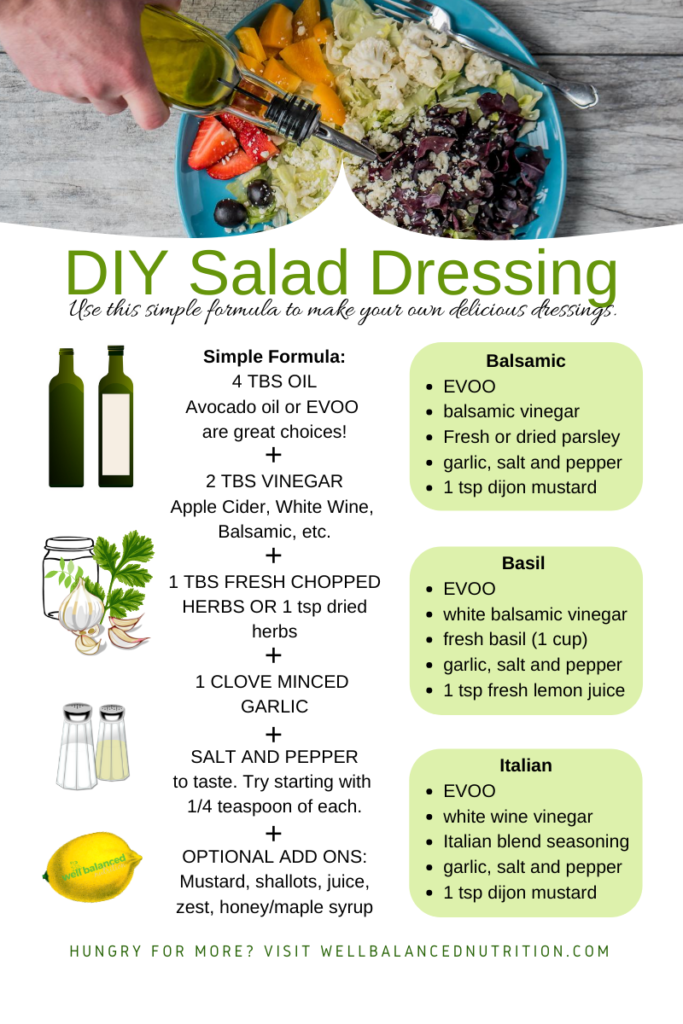
Nothing elevates a salad to “yum” status quite like a tasty, clingy dressing. Making your own salad dressing is simple, cost effective, and a great way to control additives, like sugar and preservatives, that might be hiding in processed varieties. Follow this DIY Salad Dressing Formula to make your own. You can play with the ratios but this is always a great to start! Have fun with it and find the combinations you love.
DIY SALAD DRESSING OIL TO VINEGAR RATIO:
4 TBS Oil
2 TBS Vinegar
1 TBS Fresh Chopped Herbs (or 1 tsp dried herbs)
1 TBS Chopped Garlic
Salt and Pepper to taste
Simple Arugula Radicchio Salad with Farro, Walnuts, and Oranges
Well Balanced Nutrition
Simple Arugula Radicchio Salad with Farro, Walnuts, and Oranges
A beautiful, satisfying salad that pairs well with any protein-rich food.
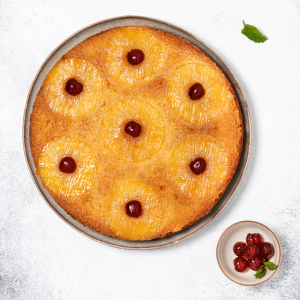
In the first episode of Cooking With Chef Christy, you’ll learn how to make pineapple upside-down cake with a few thoughtful twists.
Instead of white flour, Christy uses coconut flour, which adds more fiber and makes this a great option for those avoiding wheat or gluten. She also uses coconut sugar in place of white table sugar.
Because of these swaps, this version of pineapple upside-down cake is lower in carbohydrates, higher in fiber and protein, and may help support more steady energy and fullness compared to a traditional version. It still delivers that classic, sweet, nostalgic flavor you expect—just with a slightly more balanced nutrition profile.
Another bonus: this recipe comes together much quicker than a traditional upside-down cake, making it a simple, satisfying option for a weeknight treat or casual gathering.
Gluten Free Paleo Pineapple Upside Down Cake with Chef Christy
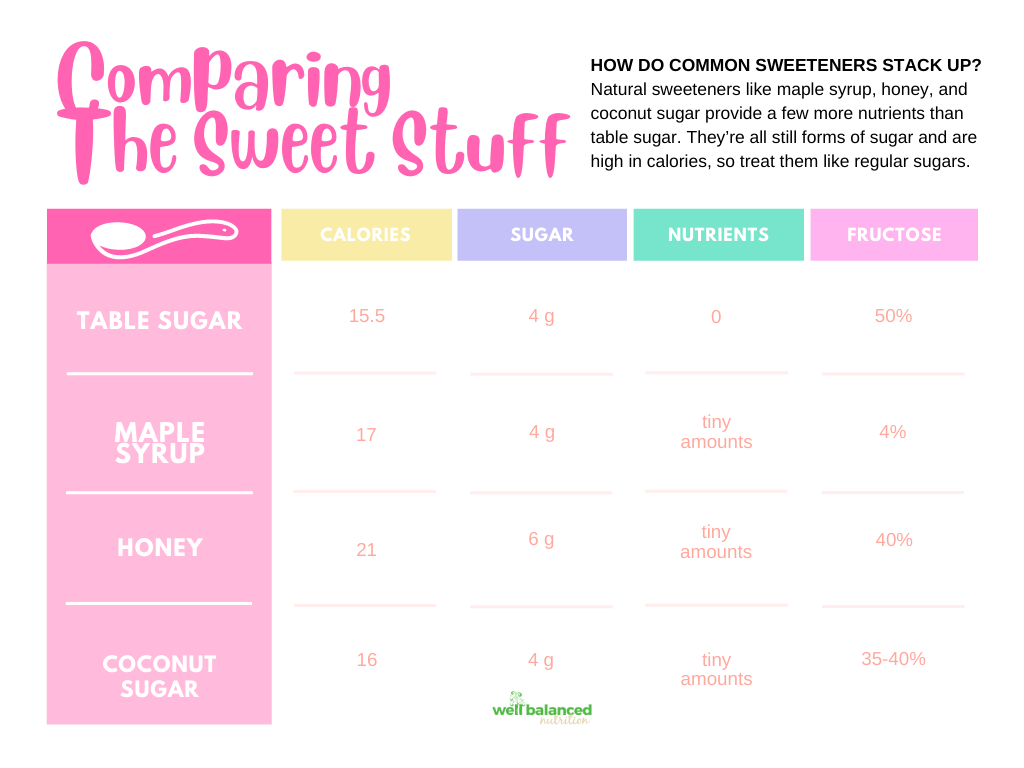
Is coconut sugar healthier than white sugar?
Short answer: not significantly.
Coconut sugar is often marketed as a healthier alternative, but from a nutrition standpoint, it’s best to treat it the same as any other added sugar.
Coconut sugar quick facts:
It has nearly identical calorie and sugar content as white table sugar
It’s made from the sap of the coconut palm and is less processed
It contains small amounts of minerals like iron, zinc, calcium, and potassium
It contains a small amount of inulin, a type of soluble fiber
Its glycemic index is slightly lower than table sugar (54 vs. 58), but this difference is unlikely to meaningfully impact blood sugar in real life
Bottom line: While coconut sugar may be slightly less refined, the differences are minimal. It still raises blood sugar and contributes to total added sugar intake.
Is Coconut Flour Healthier Than White Flour?
Coconut flour stands out primarily for its fiber content.
A 1/4 cup serving provides:
120 calories
18 grams of carbohydrates
10 grams of fiber
6 grams of protein
4 grams of fat
20% of the daily value for iron
Because of its high fiber content, coconut flour can support more stable blood sugar compared to refined white flour. It’s also a helpful option for those following gluten-free or wheat-free diets.
Important to know: Coconut flour absorbs a significant amount of liquid, which makes batters and doughs much thicker. It’s best to use recipes specifically developed for coconut flour rather than swapping it 1:1.
Why You Might Love This Version
While the nutrition differences aren’t dramatic when it comes to sugar, there are still some meaningful reasons to make this recipe:
More fiber = more staying power. The added fiber from coconut flour can help support fullness and more stable energy compared to traditional versions.
Great if you are avoiding gluten or wheat This recipe works well for those who are gluten-free or avoiding wheat, without sacrificing a classic dessert experience.
Balanced indulgence. You’re still getting the sweetness and nostalgia of pineapple upside-down cake, just with a slightly more balanced nutrition profile.
Simple and approachable. It comes together quickly, making it realistic for a weeknight treat or last-minute gathering.
It’s satisfying. With a bit more fat and protein, this version may feel more satisfying than a traditional cake, which can help you feel content with a single serving.
A Gentle Reminder
Dessert doesn’t have to be “perfect” to be part of a balanced lifestyle.
Whether you choose the traditional version or this one, what matters most is how it fits into your overall pattern. Enjoying a homemade dessert, especially one you share with others, is part of a well-balanced life too.
Well Balanced Nutrition
Paleo Pineapple Upside Down Cake (Gluten-Free)
This paleo version of pineapple upside-down cake has fewer calories and carbohydrates and a higher fiber and protein content than its more traditional counterpart. Another cool thing, this recipe comes together much quicker than a traditional upside-down cake.
Line the bottom of an 8" springform pan with parchment paper [this facilitates a clean inversion of the cake] Note a 9-inch pie/cake pan will work also.
Spray parchment lined pan with oil.
Whisk together dry ingredients - flours, baking powder, and sugar.
In a separate bowl, whisk together eggs, vanilla, and cooled coconut oil.
Add the wet ingredients to the dry and whisk until combined and you have a smooth batter.
Arrange pineapples rings in a single layer in your pan.
Add raspberries [or cranberries] to fill holes.
Drizzle the maple syrup on top of the pineapples.
Gently press the batter into the cake pan.
Bake in the oven for 30-40 minutes.
Remove from oven a let stand for at least 10 minutes before releasing from pan.
Invert onto a plate and serve.
Pineapple Upside-Down Cake Nutrition Comparison
Paleo vs Traditional from Betty Crocker <All values listed per serving> Calories: 279 vs 390 (~110 less) Fat: 15 total, 9 saturated vs 14 total, 6 saturated (1 and 3 g higher respectively) Cholesterol: 69 vs 40 (29g higher) Carbohydrates: 32 vs 62 (30g lower) Fiber: 4 vs 1 (3g higher) Protein: 7 vs 4 (3g higher)
In summary, this paleo version has fewer calories and carbohydrates, higher fat and cholesterol, and higher fiber and protein than its more traditional counterpart.
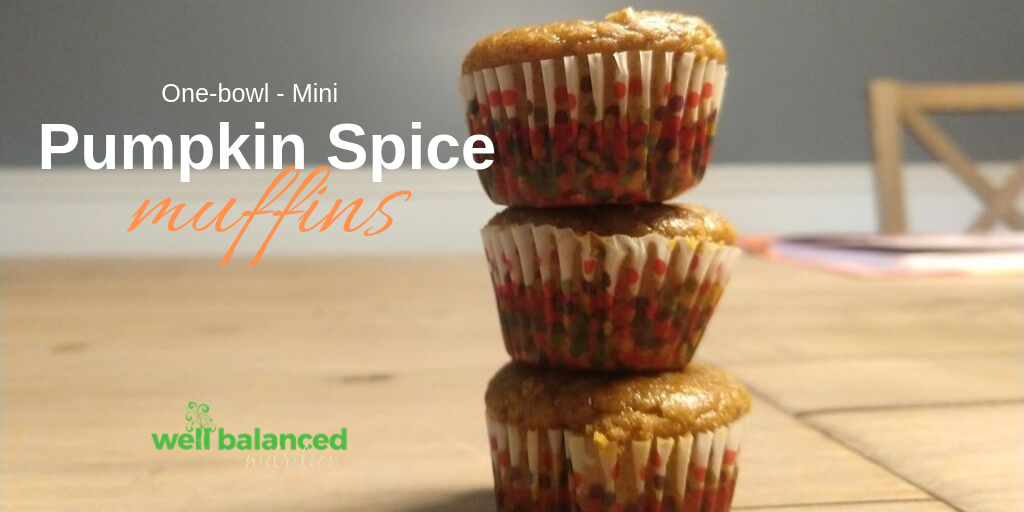
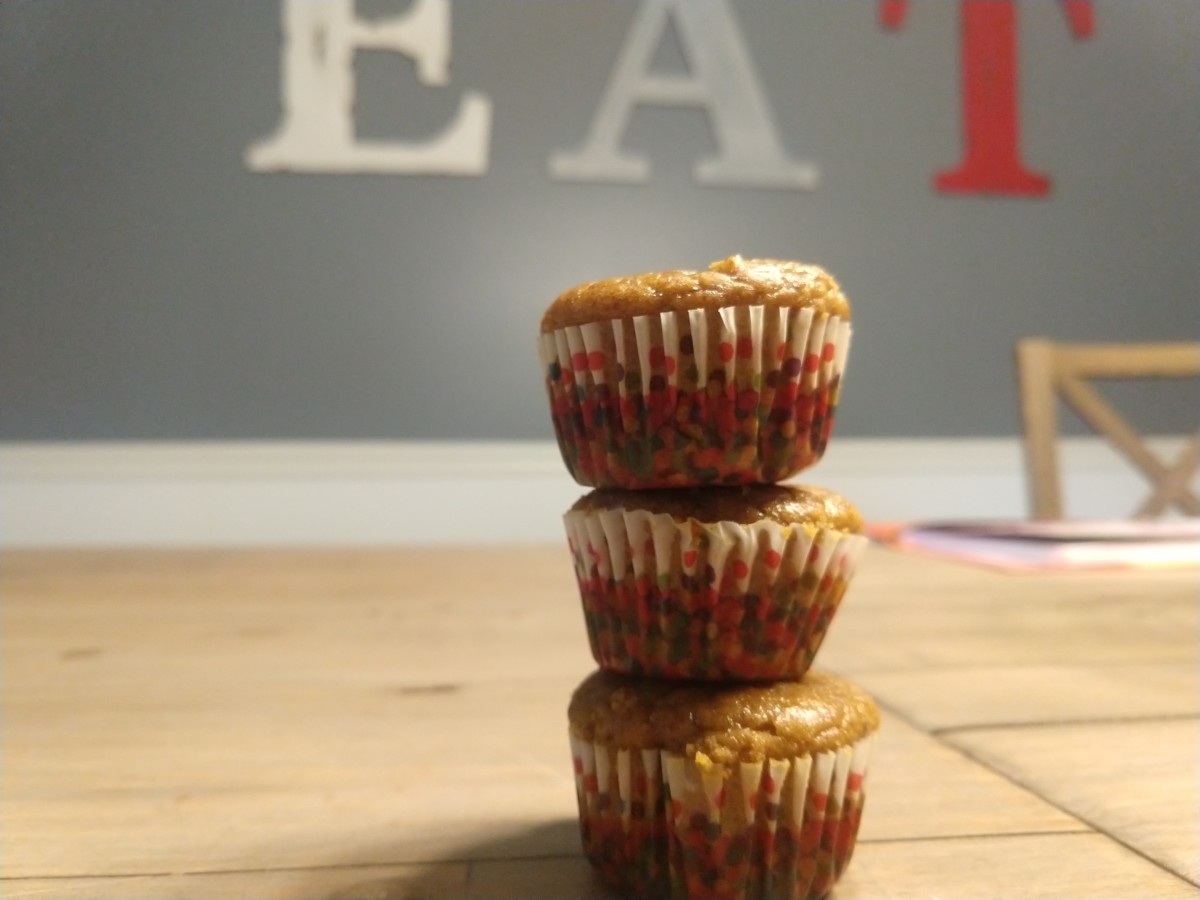
What better way to spend the first day of October than enjoying these warm and cozy Pumpkin Spice Muffins?! They taste like Fall and there are so many reasons why you will love them! Let me count the ways…
One-Bowl Wonder
I love playing in the kitchen, but I don’t love the cleanup. I’ve had plenty of clients tell me the same thing. It can definitely be a drawback to getting in the kitchen at times. Choosing recipes that need minimal equipment is key. This recipe only requires one big bowl (actually, I like to use a large measuring cup instead of a bowl) and a couple measuring spoons. Clean up is a cinch, especially if you use cupcake liners.
Full of Fall Goodness
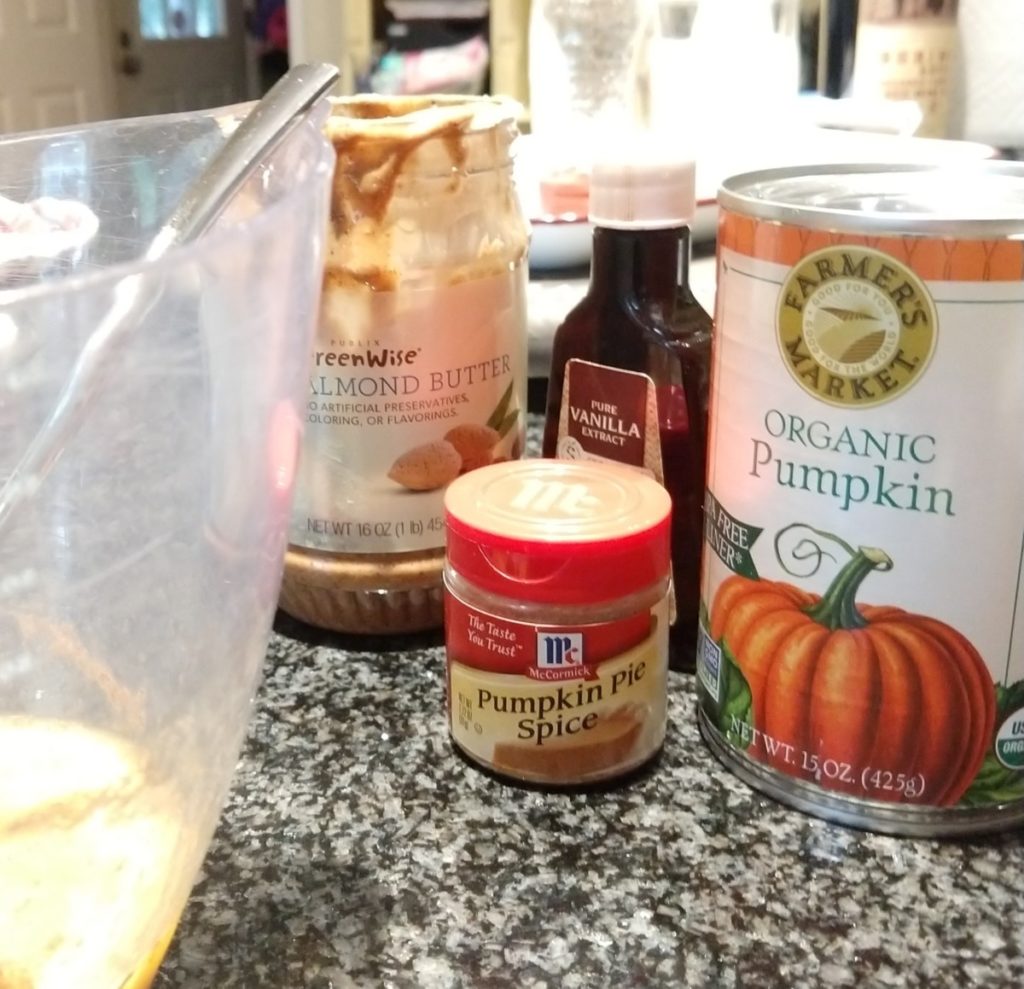
Pumpkin pie spice is all the rage this time year and it’s no wonder. The mixture of cinnamon, ginger, nutmeg, allspice, and cloves can bring about all the good feels of Fall. The pumpkin puree also makes these a delicious seasonal treat and it delivers a dose of nutritious goodness including fiber, vitamin K, vitamin C, potassium, copper, manganese, and riboflavin.
Balanced Nutrients
The nut butter and eggs in these muffins provide protein and fat while the pumpkin provides complex carbs. A mix of all the macronutrients makes for a well-balanced snack or treat. You can feel good about noshing on these with your morning coffee, with your lunch or in the afternoon.
Without further ado… I hope you enjoy this Autumn treat!
Well Balanced Nutrition
One-Bowl Mini Pumpkin Nut Butter Muffins
What better way to spend the first day of October than enjoying these warm and cozy Pumpkin Spice Muffins?! They taste like Fall and there are so many reasons why you will love them!
Add all ingredients, except coconut oil spray, to a bowl and whisk until smooth and creamy.
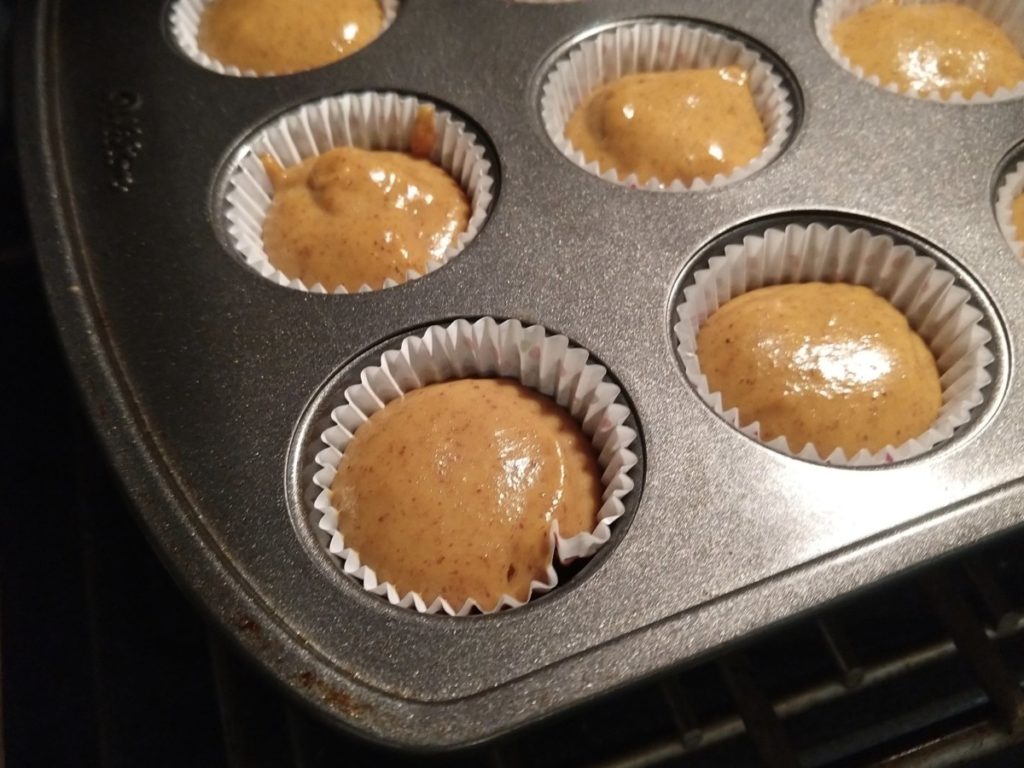
Using a small ice cream scoop or two spoons, place batter in mini muffin tins 3/4 way full.
Bake for about 10 minutes until tops spring back when touched. (If using larger muffin tins, bake time will be longer.)
Remove from oven and let stand two minutes before removing from pan.
Notes
I use almond butter because it’s my preference.Try a natural nut butter if you can, with just nuts (and maybe a pinch of salt). Don’t worry if the oil separates; that’s normal! Give it a good stir before using in this recipe.If peanut or nut allergies are in the house, a seed butter like Sunbutter works just as well.
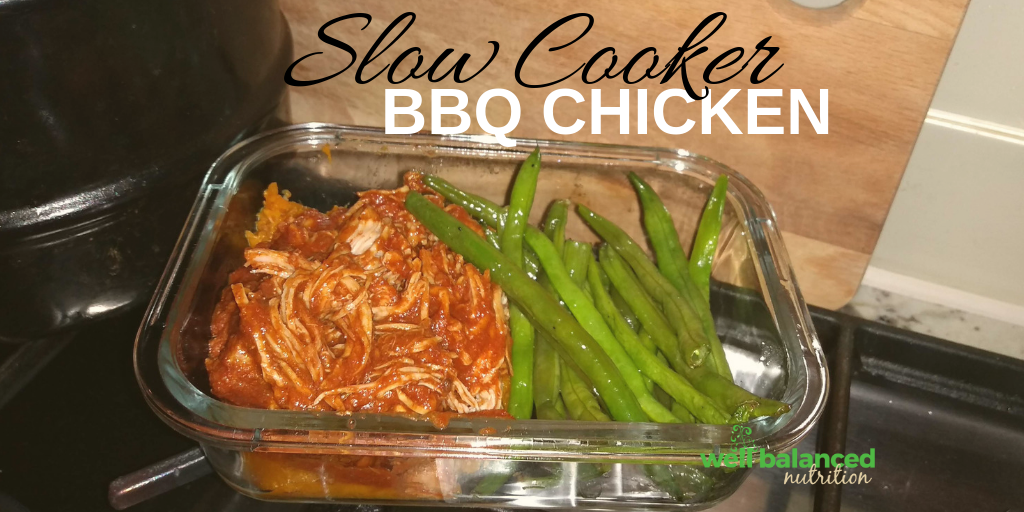
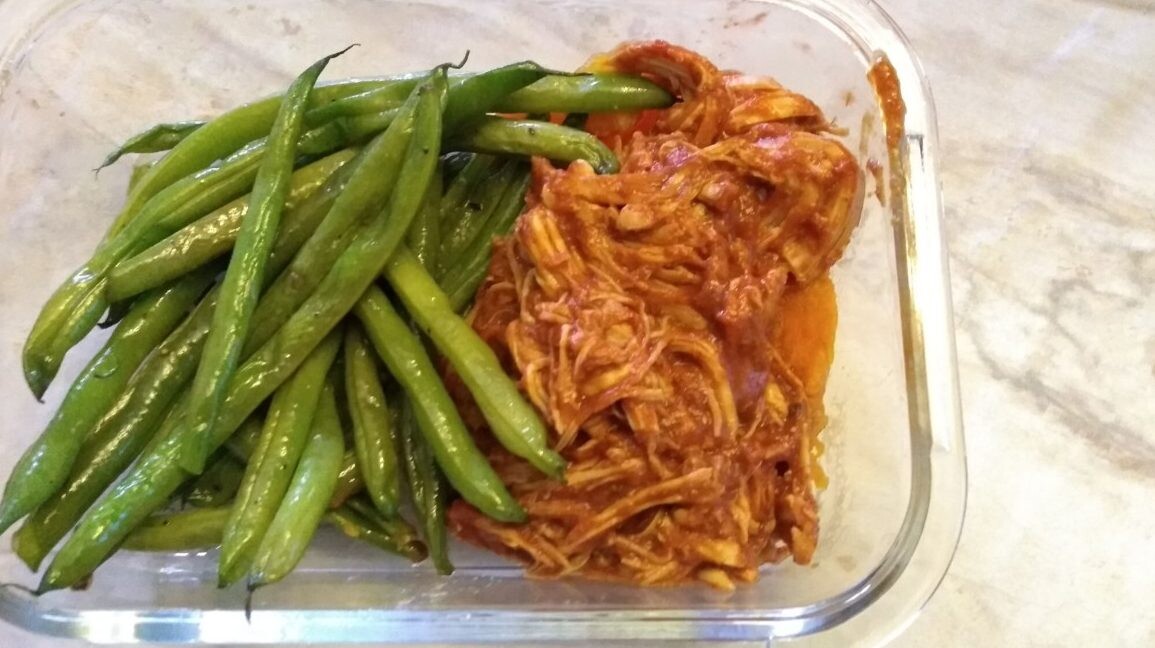
When the weather is warm and the days are long, the last thing you want to do is turn on the oven or cook on the hot stove. Even in the colder months, it’s nice to have a simple go-to meal that requires little work. Slow cooker BBQ chicken to the rescue! Whisk up this homemade barbecue sauce, pour on top of the chicken and let it cook as you get on with your day.
This slow cooker BBQ with a delicious home-made sauce is so clutch for a quick and easy meal option. Make it a freezer meal, include it in your meal prep, or make it while you are at work.
Why make your own BBQ sauce??
It is so easy to just pick up a bottle of BBQ sauce at the store. Why even bother making your own? Unlike store-bought BBQ sauces, our recipe is free of added sugar. Even recipes online will call for honey, sugar, or ketchup. There is nothing wrong with a little sweetness, but if you are mindful of your added sugar intake, you know that it can add up really quickly. We opted for nutrient-rich and flavor-boosting tomato paste instead of ketchup. Tomato paste provides a boost of vitamin C, the powerful antioxidant lycopene, and no added sugar. Don’t worry, the sugar may be absent, but the flavor is not! Smoked paprika makes a big difference in this sauce, so you won’t want to skip it.
Slow cooker BBQ chicken can be a freezer meal that’s ready to dump-and-cook or it can be part of your weekly meal prep routine.
Whisk up the sauce, pour it over chicken breasts in a freezer bag, and stash it away until you need it. Simply, defrost the day before you want to cook it. It is also a great meal prep option.
Make it a Well Balanced Meal
Barbecue chicken is very versatile. On its own, it is Paleo, Low Carb, and Whole30 friendly. You can enjoy it on a hearty whole grain bun or a sweet potato with a hefty helping of sauteed zucchini, green beans, or another vegetable you enjoy.
.
Kristen Norton
Slow Cooker BBQ Chicken
A delicious homemade BBQ sauce recipe with antioxidant rich tomato paste and free of added sugars.
To provide the best experiences, we use technologies like cookies to store and/or access device information. Consenting to these technologies will allow us to process data such as browsing behavior or unique IDs on this site. Not consenting or withdrawing consent, may adversely affect certain features and functions.
Functional
Always active
The technical storage or access is strictly necessary for the legitimate purpose of enabling the use of a specific service explicitly requested by the subscriber or user, or for the sole purpose of carrying out the transmission of a communication over an electronic communications network.
Preferences
The technical storage or access is necessary for the legitimate purpose of storing preferences that are not requested by the subscriber or user.
Statistics
The technical storage or access that is used exclusively for statistical purposes.The technical storage or access that is used exclusively for anonymous statistical purposes. Without a subpoena, voluntary compliance on the part of your Internet Service Provider, or additional records from a third party, information stored or retrieved for this purpose alone cannot usually be used to identify you.
Marketing
The technical storage or access is required to create user profiles to send advertising, or to track the user on a website or across several websites for similar marketing purposes.